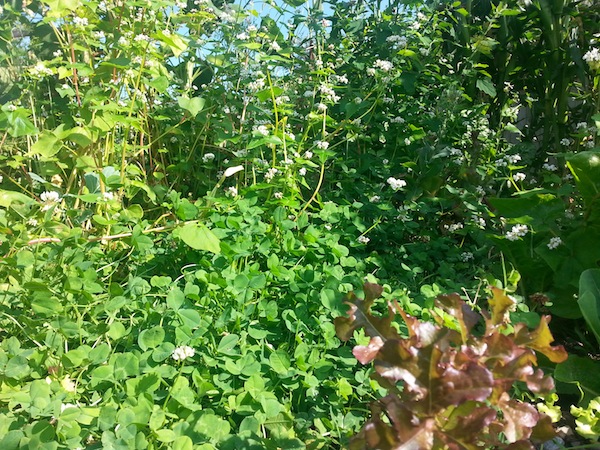
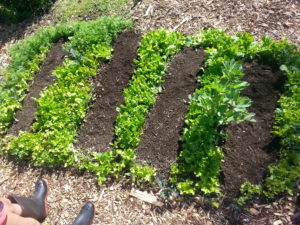
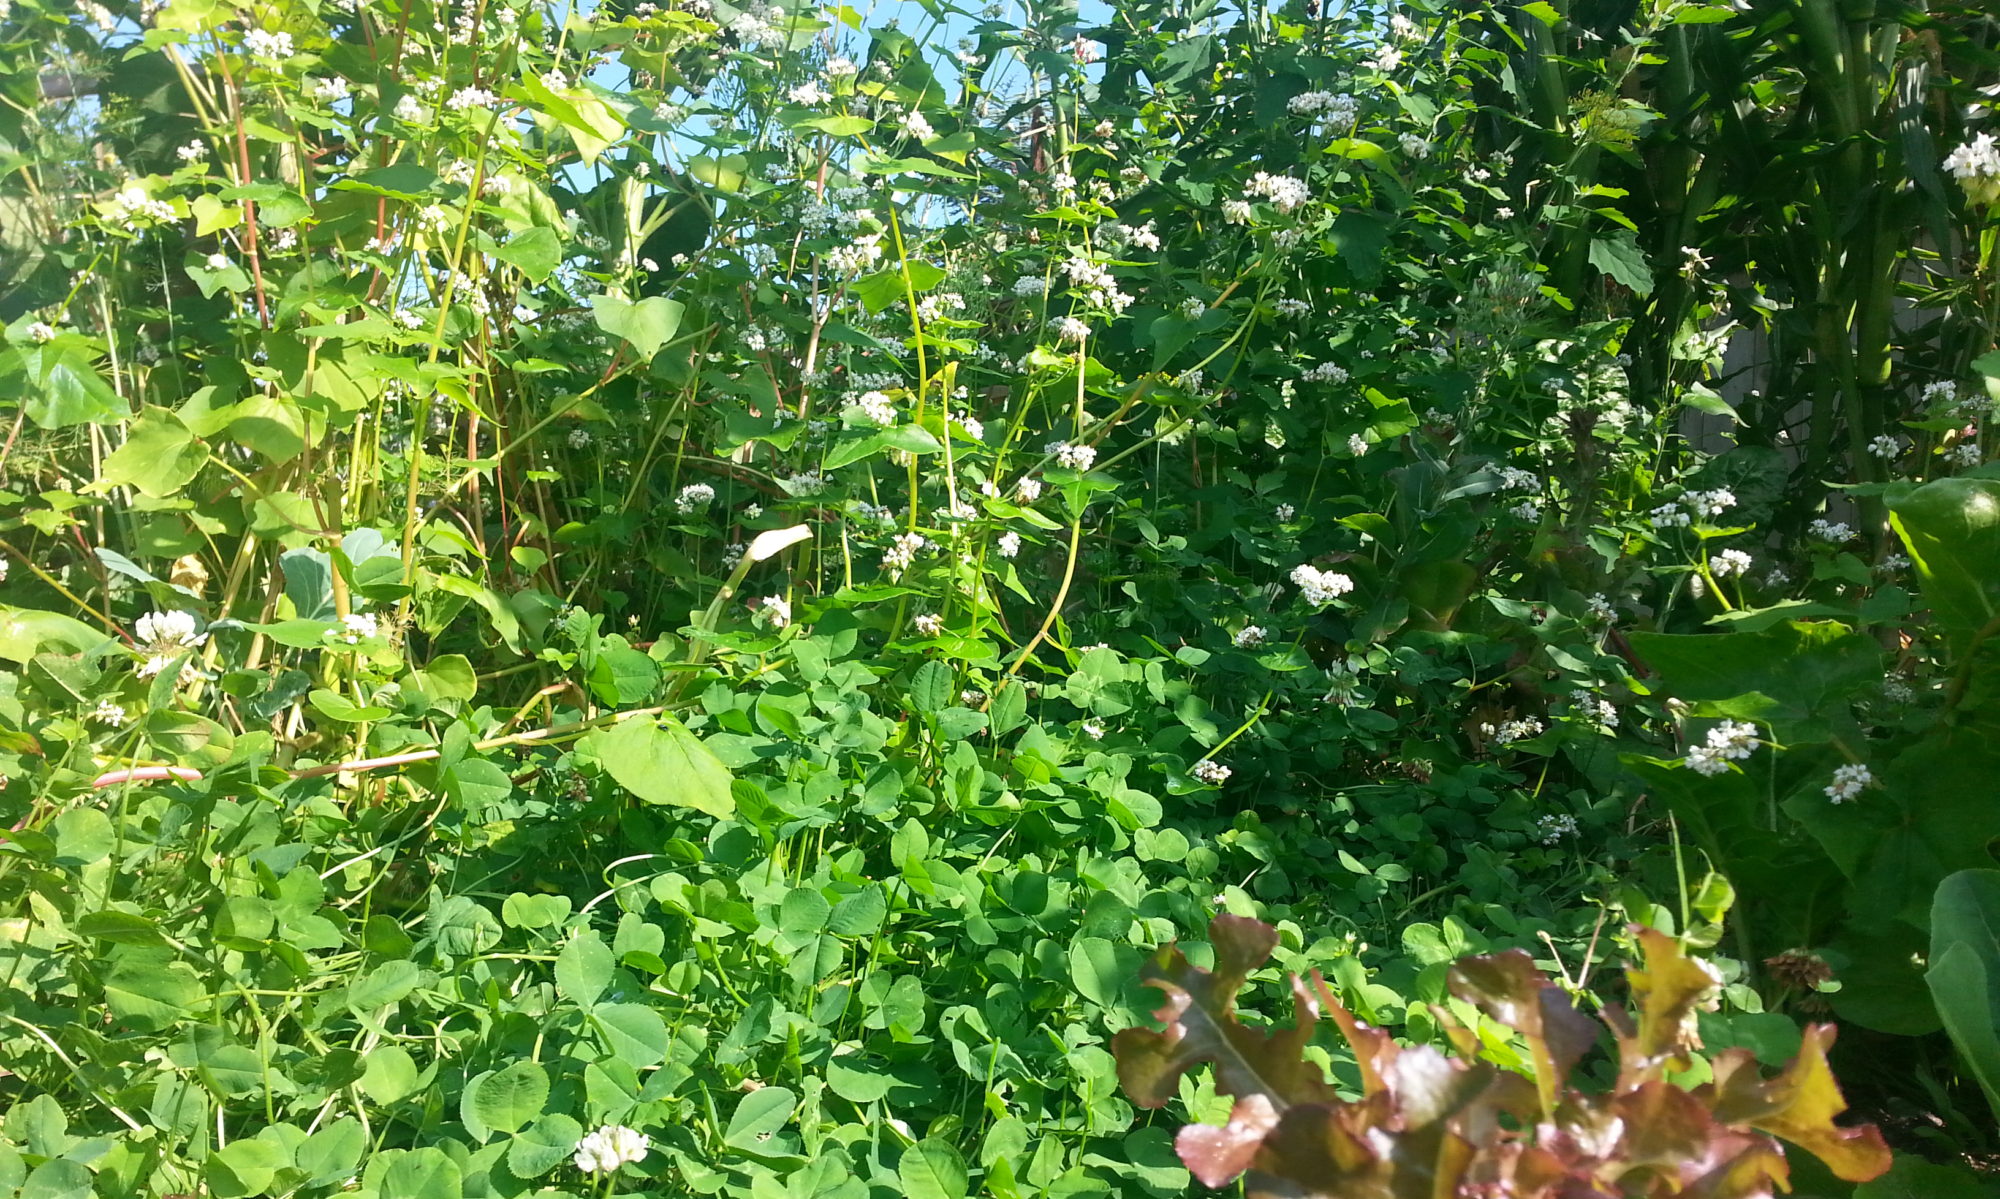
Today I counted twenty different kinds of plants growing in the small kitchen garden bed closest to the house. Of the twenty different species –
19 are edible
6 are perennial
10 are self-seeding annuals or biennials
4 require annual sowing by us
The bed is four feet by seven feet, about the same square footage as a queen size mattress. As I made a quick mental inventory of the edible plants growing in the bed, I had a startling revelation: If this bed was our entire garden, we would have something fresh to eat virtually every day year-round!
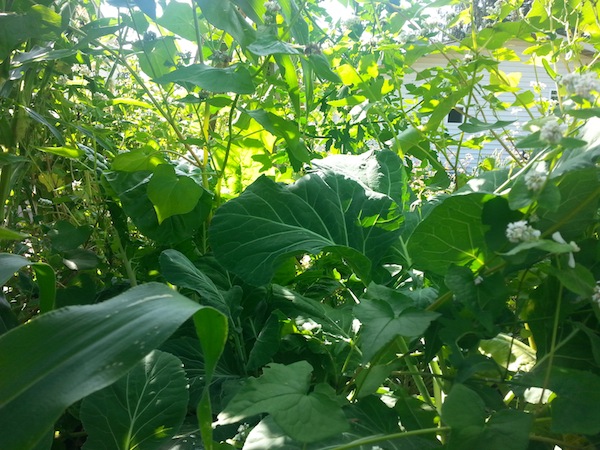
The giant cress and corn salad grow through all but the coldest winter weather, and kale puts in a good appearance late into fall and again in early spring. The fresh herbs are harvested most of the year and also dried for anytime use.
Any bare soil showing in earliest spring is plugged full of pea and fava beans. You can usually cut the shoots for fresh eating once or twice without harming the plant. In May and June we chop-and-drop some buckwheat, bolting lettuce, and spent corn salad to make room for bush beans.
Here’s the full plant list –
Peas – sown annually by us Fava beans – sown annually by us Chives – perennial Parsley – self-seeded annual or biennial Kale – self-seeded annual or biennial Bush Beans – sown annually by us Phacelia – self-seeded annual or biennial (non-edible) Oregano – perennial Italian chicory – self-seeded annual or biennial Walking onions – perennial Perennial bunching onions – perennial Buckwheat – self-seeded annual or biennial Corn salad – self-seeded annual or biennial Giant cress – self-seeded annual or biennial Lettuce – self-seeded annual or biennial Marjoram – perennial Borage – self-seeded annual or biennial Lemon thyme – perennial Shallots – sown annually by us Arugula – self-seeded annual or biennial
(With cherry, eleagnus, currant, and artichoke in the back.)
Just another piece of the beautiful chaos at the Food Forest Garden at Munson Manor!
Mixed canopy
Canopy means cover. In a garden (or a forest, or a forest garden) plants are the cover. A “mixed canopy” garden means that the garden is covered (canopied) with a mix of plants, ie – plants that vary in height, density, species, maturity etc.
Polyculture
Poly = many.
Culture = tend, grow, cultivate.
Polyculture in a gardening context means the growth, tending, or cultivating of many types of plants. This can perhaps be understood most clearly in contrast to its opposite: monoculture.
A monoculture is the growth or cultivation of a single species at the exclusion of all others. Most industrial agriculture is monoculture; a single crop is sown, tended, and harvested on a single timeline. All other plants (in fact oftentimes virtually all other life forms) are unwelcome and are treated as enemies.
A polyculture is the simultaneous growth or cultivation of many species. Sowing, tending, and harvesting happens on complex, intersecting timelines, not on a single timeline.
Mixed canopy polyculture and food forest gardening
In a mixed canopy polyculture like the one in the Food Forest Garden at Munson Manor, plants of many different types, at many different stages of maturity, are grown simultaneously in close relationship.
The canopy – the cover or top layer of the garden/forest/living system – is mixed; it is of mixed height, mixed type, mixed age, mixed density, mixed function etc. Trees, shrubs, various perennials, groundcovers, herbs, and annual vegetables all form this canopy at different times or stages and in different locations in the garden.
This type of design is quite different from the monoculture model, and it comes with certain characteristics, especially the characteristic of diversity. By definition, mixed canopy polycultures are more diverse than their mono counterparts. This diversity includes the cultivated plant species, but may also include weedy volunteer plants as well as insect and animal life.
The diversity of a mixed canopy polyculture extends beyond species and includes diverse harvests/yields/crops, diverse management tasks and techniques, diverse timelines, and diverse form and aesthetics.
Other characteristics are also implied –
Bare soil is minimized
The form and function of the garden is dynamic and evolving
Water requirements are relatively low
Hand-based management is more appropriate than machine work
Biomass is high
Fertility is maintained on-site with few or no inputs
On-site propagation (including seed-saving) is practical
Microclimates are created
Resiliency
Like most backyard gardeners, we dedicate a few beds to annual (or biennial) vegetables each year. Even these beds have a small-scale mixed canopy polyculture look and feel. Last year’s six foot tall flowering kale provides dappled shade for baby summer lettuces. A tangle of seeding corn salad (mache) mulches the young cabbage plants until the seed is ripe and harvested. Weeds like chickweed, lambsquarters, and purslane provide dense edible groundcover that keeps the soil protected and friable until we want to plant something there. This kind of complex and semi-improvised cross-succession of weeding, planting and harvesting unfolds throughout the season, maximizing diversity, interest, beauty, fertility, yield, and delight.
Mixed canopy polyculture looks a lot different from how many folks expect a garden to look. Chaotic, messy, overgrown, and weedy are all descriptors that we’ve heard from the uninitiated.
Sometimes half a dozen different edible plants can be found within a square foot; garlic interplanted with lettuce, fava beans, arugula, and giant cress; corn with cucumbers and buckwheat twisting up the stalks and swiss chard and potatoes peeking out at the edges; tall collards and dill stacked over parsley, lettuce, bush beans and edible violets (aka Johny-jump-ups).
Many of our guests don’t know what to make of our food forest garden. They have no context for understanding it, no conceptual box that it fits into; they really don’t know what they are looking at!
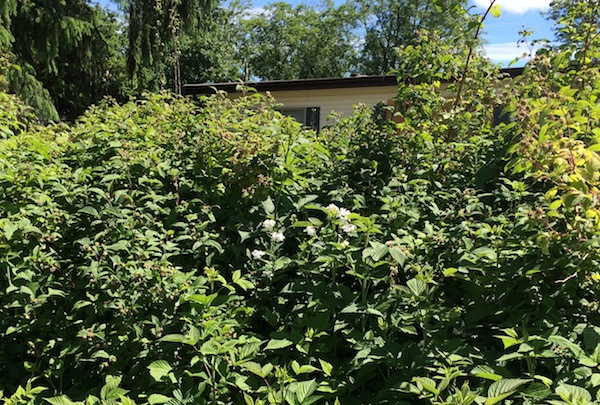
The other day Sue was in the front yard harvesting raspberry leaves for tea. A neighbour walked by and commented sympathetically “Looks like you got some weeds to deal with there.” When Sue pointed out that he was actually looking at a sea of raspberries, young pear trees, mulberry, volunteer fireweed, and a planted groundcover of insectiary native yarrow and nitrogen fixing red clover this man did a double take and his eyes did a rather funny thing.
Learning to see the implicit order, let alone the beauty and wonder, in a mixed canopy polyculture garden like ours can take some time. That’s OK, we plan to be here a while.
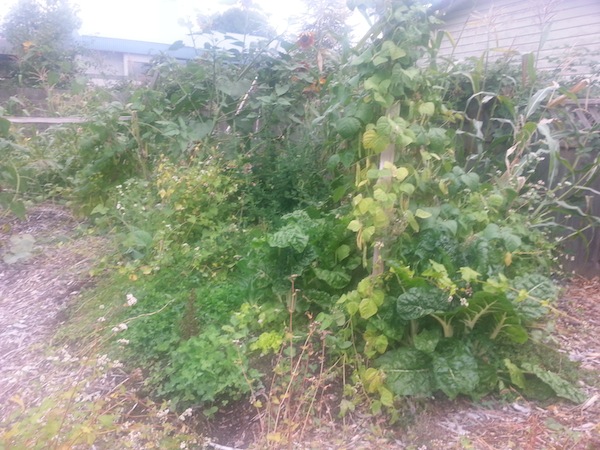
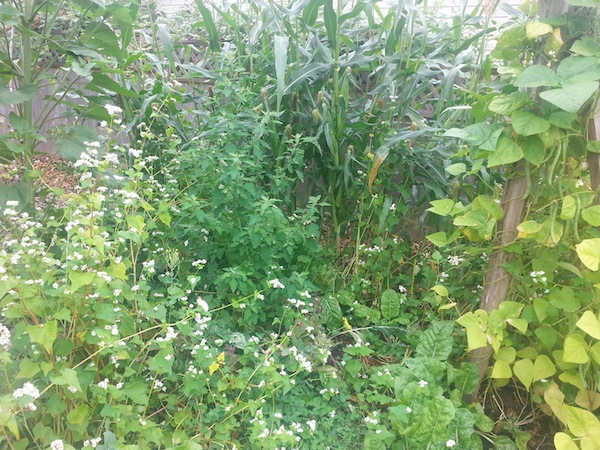
The view from below – Collard greens enjoy a cooler microclimate under the canopy in August heat.Corn, chard, pole beans, cucumber, purslane, lambsquarters, buckwheat, and more are tightly packed into an 8-foot bed. Summer 2016 at Munson Manor.Multiple levels of intrigue and nourishment at the Food Forest Garden at Munson Manor.The sea of raspberries covering the boulevard at the front of the house can be a little intimidating for the uninitiated.
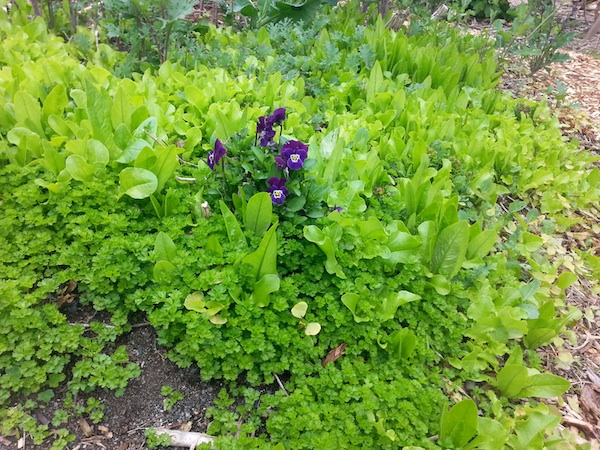
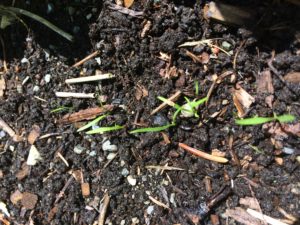
We like our garden pretty wild , but some things grow better when they’re more organized. I love carrots. Last year I planted seeds but the rows quickly were taken over by other plants and got lost in the jungle. I harvested one delicious but pathetic carrot. This year, I am going to give them the attention and care they need to flourish. It was a little sad to break up the verdant beds, but it’s carrots or bust!
The sacrificial bed.
We started by eyeing out a few twelve inch wide planting rows across the beds currently bursting with greens in what we call our “kitchen garden” – a handful of small garden beds and fruit trees just out our kitchen/back door (don’t underestimate the importance of of proximity in your own garden design; get a few small garden beds as close to the kitchen as possible!).
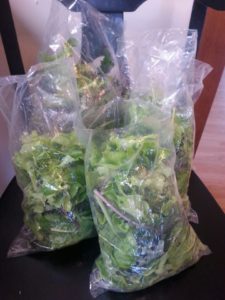
Then we cut swathes of salad greens from the beds and prepared soil for seeding. We ate a lot of salad and gave a bunch away to friends. snip, snip
Salad greens anyone?
Leftover plant refuse including roots was used to thickly mulch the peas. (In permaculture lingo, this is called “stacking functions”, i.e. a single action or intervention has multiple benefits.) With this mulch the peas will likely require no irrigation, even with the increasingly warm temperatures.
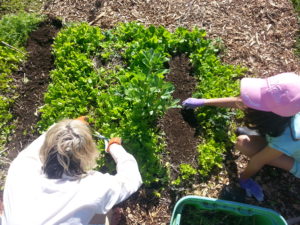
Willa & I preparing the fine seed beds to plant carrots.
Furrows were made, little tiny carrot seeds planted, and voila, a new bed of mixed greens and carrots. We can still harvest greens daily and keep a close eye on the seedlings. The regular watering that the carrot seedlings require will keep the salad greens tender at the same time.
Carrot beds interspersed with salad greens. May 21, 2017
These types of seed beds do need a little more care and attention than the wilder parts of the garden, including watering and weeding. Luckily I’m good at both those things.
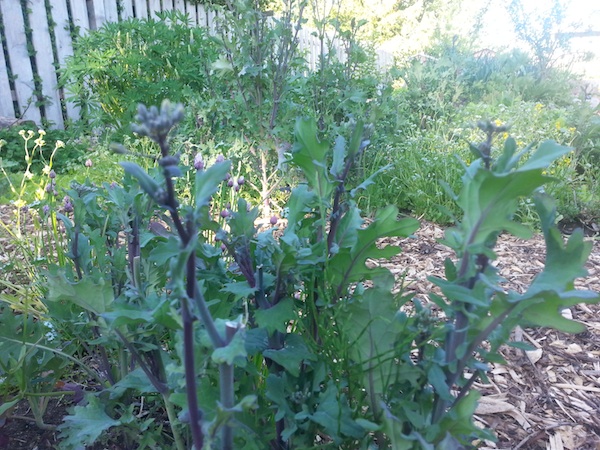
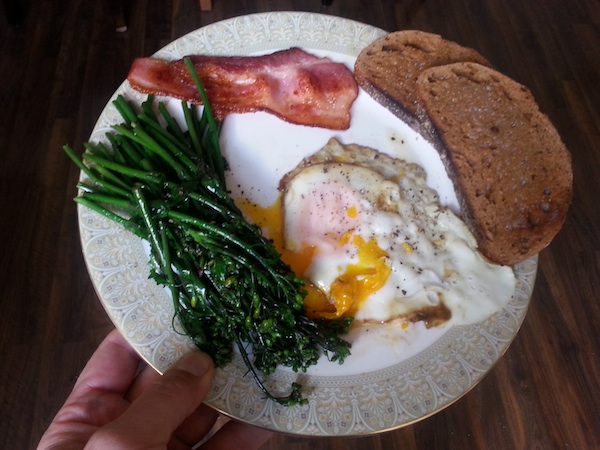
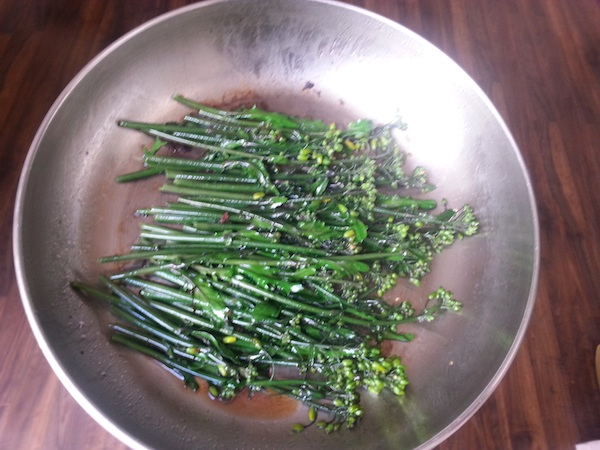
Kale flower shoots (aka florets, raab, buds) are one of my favourite spring garden delights. They’re tender like asparagus, deep green, and a little sweet. I like to fry/baste them in a little tamari and olive oil, or drop them into the pan right after the bacon comes out (cover quickly or get spattered with bacon fat!) and serve them with bacon and eggs and toast for brunch! Yum!
Kale flower shoots with bacon and eggs… Yum!
There are many types of kale, but in our coastal BC climate Red Russian Kale and its various natural crosses do best. You never find this kale variety in the store because, while it is unparalleled for sweetness, tenderness, vigour and tastiness, it does not ship or “hold” well; it needs to be eaten straight out of the garden.
Red Russian kale is perfect for the food forest garden because it self seeds prolifically, it’s opportunistic and finds purchase in any small bit of exposed soil or even mulch, and it will tolerate some shade. It fits nicely into our successional mixed canopy beds, and bees and other insects LOVE the flowers.
Kale flower shoots basted in the pan. Add a little crushed garlic if it suits you.
Kale is a biennial, meaning it grows in the first year, then sets seed and dies in the second year. I collect fistfuls of seed each summer/fall and sow it liberally. I like to get it growing early in the season so it has a chance to get big and strong for overwintering. Of course the first plants up in the spring are usually the self-seeded ones from the previous fall.
Kale leaves taste best after frost and can be harvested periodically throughout the cool shoulder seasons, although the youngsters can be cut small and added to spring salads.
This time of year (May) it’s fun to try and keep up with harvesting the flower shoots before they burst into flower. To harvest, snap them off as far down as the stalk remains tender. They’ll grow new seed shoots within a couple days. I do like to leave a couple robust plants alone to set seed undisturbed.
These are two easy and fun to use permaculture design principles.
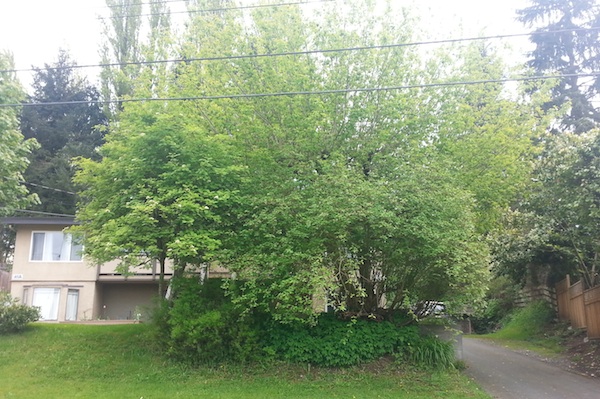
The other day I happened upon a tightly packed collection of trees, shrubs, perennials, and groundcovers in a nearby front yard (see the photo below). I was immediately struck by the densely layered, or “stacked” architecture of this little island of mixed plants, and my imagination quickly translated what I was seeing into an edible design –
A haphazard front yard plant guild; the type we see throughout the neighbourhood – Food forest inspiration!
Squint your eyes and you might almost see a hazelnut, Asian pear, and cherry tree forming the overarching canopy, with raspberries, an eleagnus or two (aka goumi berry), and Saskatoon berries or blueberries poking out around the margins. Various mints and red clover cover the ground in between, and give way to a carpet of daylilies, rhubarb, and strawberries around the further edges.
Perhaps a strip of garden bed growing kale, lettuces, beans, and potatoes, with chives and thyme at either end enjoys the full sun exposure at the south edge of the canopy.
Native huckleberries and salal show up uninvited in a year or two, staking their own claim to this former rainforest, and you decide to let them be, allowing them their age-old rightful place.
Imagine also friends coming by to visit, and then leaving with armfuls of plants – strawberry, raspberry, mint and more – that have wandered and multiplied of their own accord.
If you start to look closely at the plant communities around you, you’ll see food forest garden inspiration, ideas, and models everywhere.
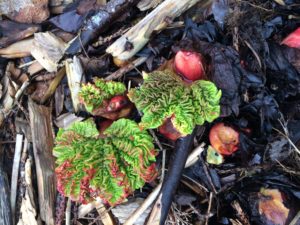
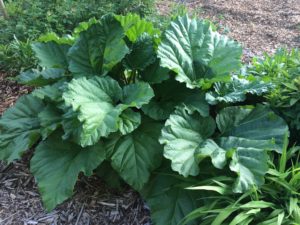
Rhubarb is a staple in our food forest garden. It is one of the first things to poke out its nose in the spring, with crinkly beautiful green and red leaves.
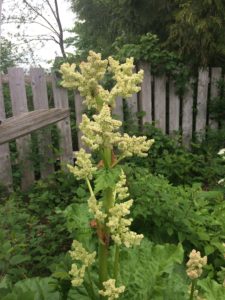
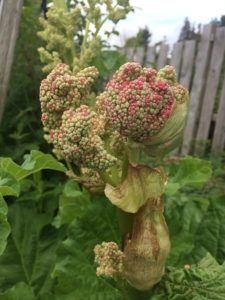
Rhubarb in the food forest garden March 17, 2017Two months later, the rhubarb is huge and I have been harvesting from it for a couple of weeks now. This year, three of the biggest plants are flowering (also known as “bolting”). Most people cut back these flowers because the plant puts so much energy into growing them instead of the edible stalks. My mom confessed to me she had never seen a rhubarb flower and she’s 81! We have nine vigorous plants and we decided to let them do their thing as an experiment. (So far the only thing interested in them are the ants.)
You can grown rhubarb from seed, but it’s easiest to plant “crowns”. Better yet is to get a division from a friend or neighbour – in order to maintain health and vitality, plants need to be divided every few years – we got all of ours from Justice’s mom.
You can use rhubarb in lots of ways: eat the stalks raw, pie, preserves, cakes, stewed. When harvesting, take a sharp knife with you. Pull the stalk from the crown and twist free. Cut the poisonous leaf off and drop as mulch around the plant (in permaculture and food forest garden circles this is sometimes called the “chop and drop” method).
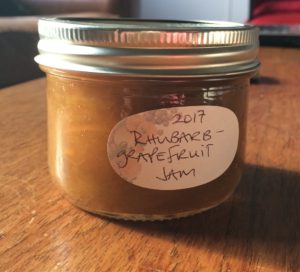
We try to eat and use what is in the garden in season. Argh, that sounds so pretentious! I lived in Vancouver for twenty years and never gave much thought to seasonal eating. I just bought what I wanted when I wanted. This spring, I was lucky enough to have fresh grapefruit from my parents’ place in Palm Springs. No one was eating them and I didn’t want them to go to waste so I made a delicious rhubarb-grapefruit jam, (I was inspired by these two recipes: http://www.thewednesdaychef.com/the_wednesday_chef/2008/06/chez-panisses-r.html and http://www.dinnerwithjulie.com/2013/11/04/rhubarb-grapefruit-marmalade/)
Harvest rhubarb, discarding the leaves in the garden. Wash, pat dry and cut into ½ inch slices.
Using a reamer, juice both grapefruits, reserving the pith, membrane and seeds. These contain pectin and you can put them into a cheesecloth square to go into the pot.
Slice the grapefruit peel into little strips or chop finely, whichever you prefer. Both are nice.
Put the rhubarb, chopped zest, juice and sugar in a large heavy-bottomed stainless steel pot. Let the mixture stand overnight (this allows the sugar to dissolve and the rhubarb to release its juice.)
Prepare five 250ml (8oz) canning jars and self-sealing lids in boiling water, following the manufacturer’s instructions. Put a small plate in the freezer to be used later to test the consistency of the jam. Bring the pot of fruit to a boil over high heat, stirring occasionally. The mixture will bubble high up the sides of the pot. Skim off any light-colored foam collecting on the edges. (The foam is delicious in smoothies!)
Soon the jam will subside, still bubbling thickly. Stir frequently and make sure it doesn’t stick to the bottom. If it burns even slightly it affects the colour (although not the taste). Use a candy thermometer or start testing for consistency by putting small spoonful of jam on the cold plate.
When the jam has cooked to the thickness you want, turn off the heat and carefully ladle the jam into the prepared canning jars, allowing at least 1/4 inch of headroom. Seal with the lids according to the manufacturer’s instructions. The preserves will keep for 1 year.
Rhubarb Fun Facts:
Rhubarb leaves are toxic because of their high oxalic acid levels.
Rhubarb is used as a fruit, but really it’s a vegetable.
Rhubarb was grown and traded in China as early as the 16th century.
Rhubarb plants can be harvested for up to twenty years if managed well.
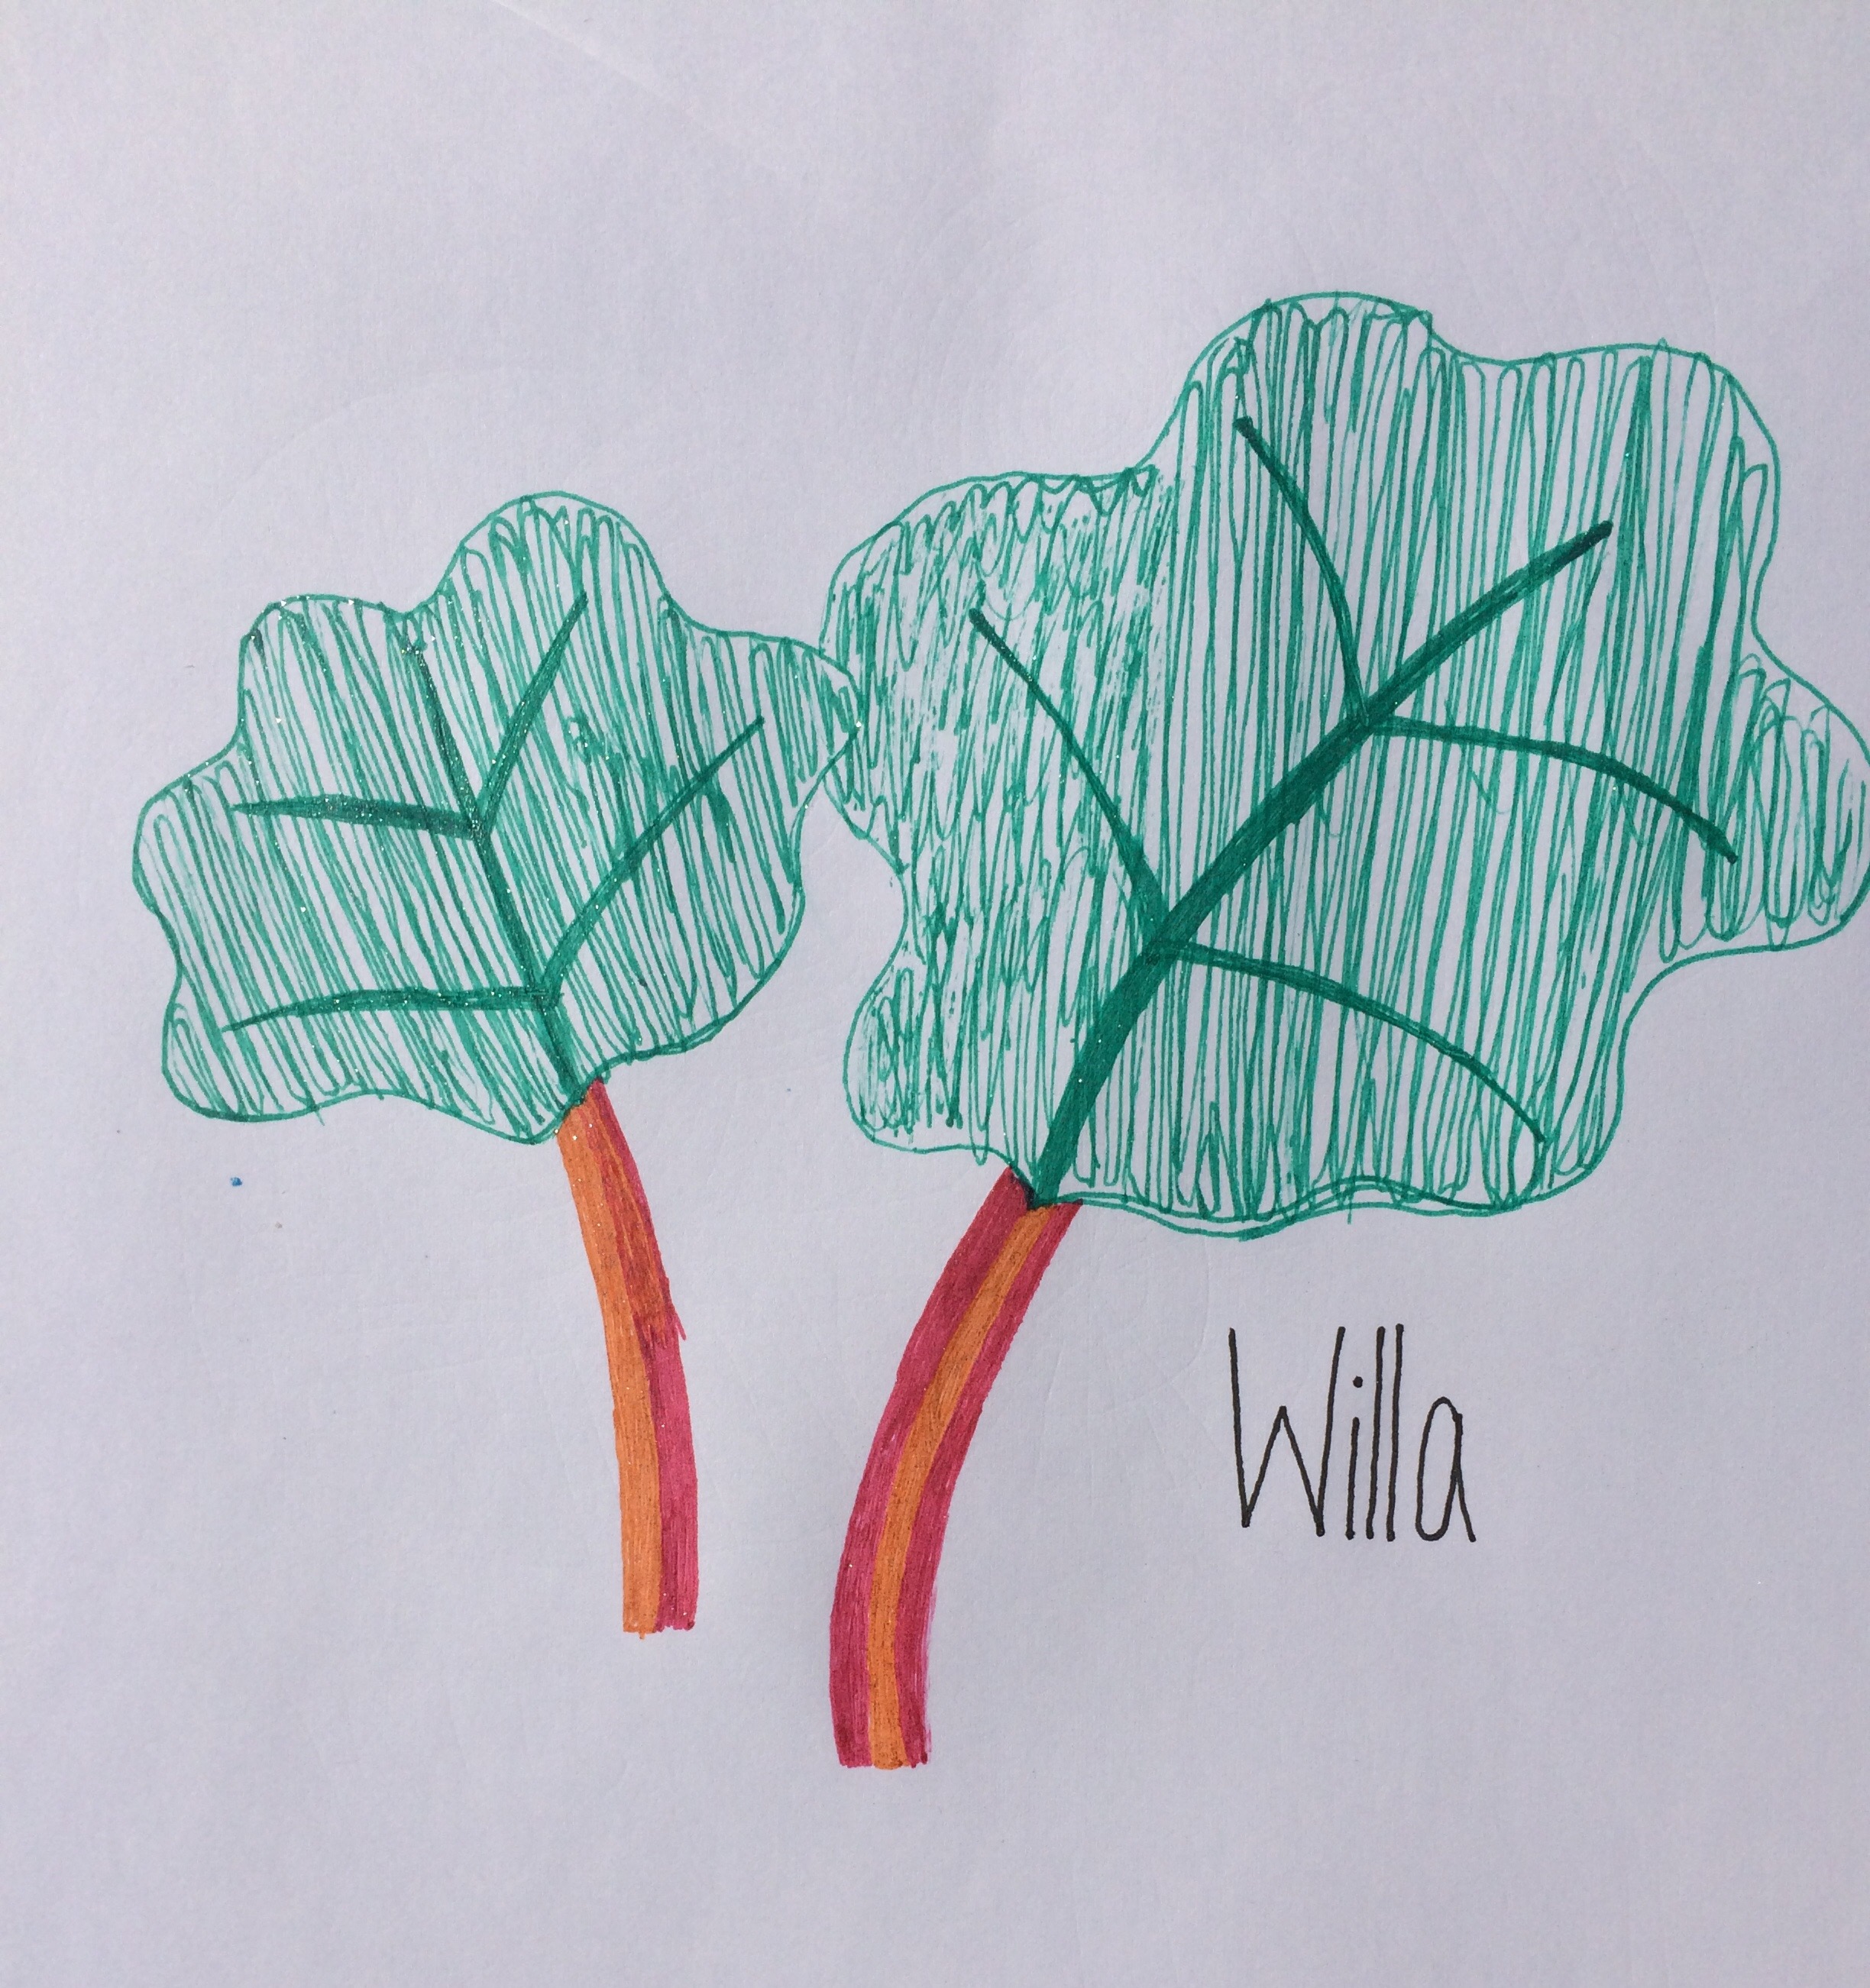
Beautiful rhubarb plant May 17, 2017A young artist’s rendering May 22, 2017
 Today I counted twenty different kinds of plants growing in the small kitchen garden bed closest to the house. Of the twenty different species –